Followers of Smokey’s painfully slow build-up know I have many fun things planned for this go-anywhere dual-purpose Jeep. Why, then, one might ask, would I spend time and money installing coil spacers — and only going up an inch and a half, at that?
Good question. Here’s the answer.

Teraflex’s leveling kit includes four one-inch spacers for the front springs and a pair of similar spacers out back. (Not pictured are the longer front sway bar end links, which were unnecessary for my application.)
I’m going to need tires early in 2016. (From the three new punctures I pulled when rotating the tires yesterday, I may need them a bit sooner!) When I replace those tires, the last thing I want to do is replace a worn set of 32-inch rubber with more 32-inch rubber. I’m well aware the Jeep JK will accept 33-inch tires, at least the skinny 10.5-inch wide models, without a lift. But, since only half a larger tire’s diameter translates to extra height, I really want to move to a 34-inch tire next. To do that without risking my fender flares under trail extension, I needed some kind of height boost.
The good folks at Teraflex had the answer I was looking for. They offer a 1.5-inch leveling kit that lifts the front of the Jeep two inches (four one-inch pucks) and the rear one inch. This not only will clear a slightly larger tire, but it eliminates that annoying nose-down look Jeeps come with from the factory. And, while Teraflex sells their kit for about $160 (prices will vary slightly by retailer), I was able to save some cost by ordering just the six coil spacers. (I installed a set of Teraflex quick disconnects, which are part of the complete leveling kit, about a year ago.)
Installation was a simple affair, though I do recommend the following:
- Don’t install your kit outdoors on a 99-degree sunny day
- Don’t attempt your installation if you’re still recovering from bronchitis
- If you are recovering from bronchitis — and are asthmatic to boot — do remember to keep your inhaler handy
Yeah, you can guess how I learned these oh, so obvious lessons. This guide is a little light on photos, as I quickly became less concerned with taking them as I was with (a) completing the job and (b) breathing.
NOTE: I owe a huge thanks to my friends Jeff L. and Don H. for helping with this install!
Materials/tools needed:
- 4 Teraflex 1″ front coil spacers (Part No. 1953075)
- 2 Teraflex 1″ rear coil guide & spacer (Part No. 1954100)
- 18 mm box wrench or socket
- 18 mm deep-well socket
- 19 mm box wrench or socket
- 10 mm box wrench or socket
- 10 mm deep-well socket (optional)
- Torque wrench
- Automotive grease
- Floor jack
- Lug wrench
- Flat-head screwdriver or trim puller
- Spring compressors (optional)
- Shop towels (optional)
Front spacer installation
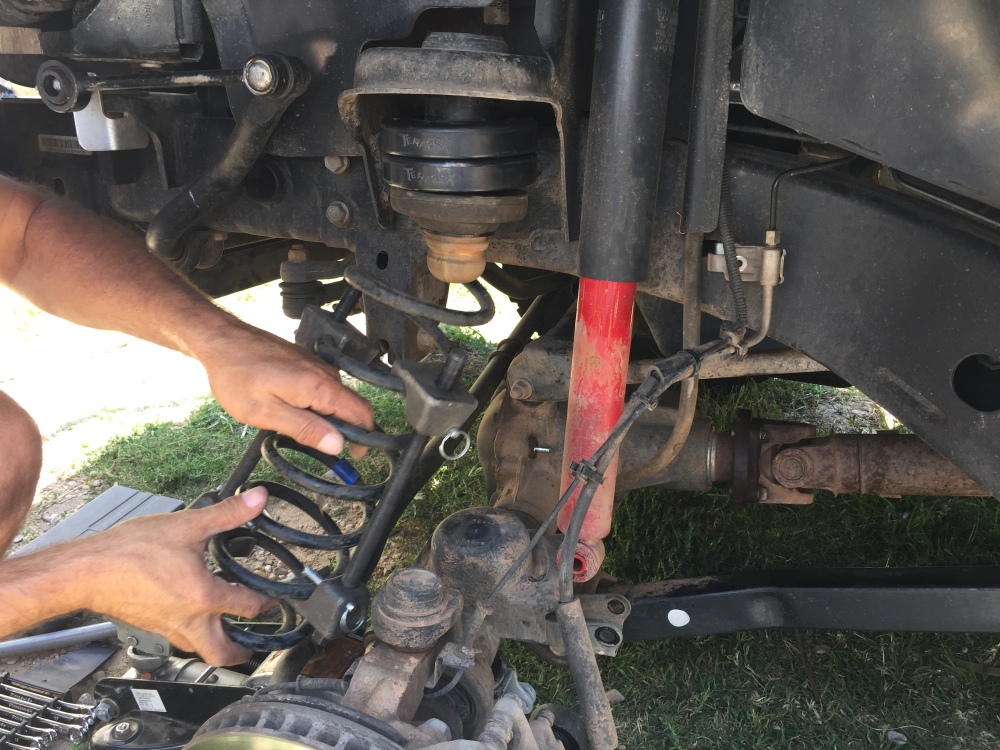
Taking the installation one wheel at a time, loosen all five lug nuts and jack up the front axle to remove the wheel. Teraflex’s prudently cautious instructions call for the removal of any wiring harnesses (absent on my non-Rubicon) and of the hard brake line from the frame. We removed the brake line from the first wheel, only to realize Jeep accounted for plenty of slack. Use your best judgment on your own installation. Next, use an 18 mm socket and wrench to remove the lower shock bolt to allow the axle plenty of droop.

Using a spring compressor to aid in installation, return the front springs to their perches. Make sure the bottom coil wraps into its proper groove.
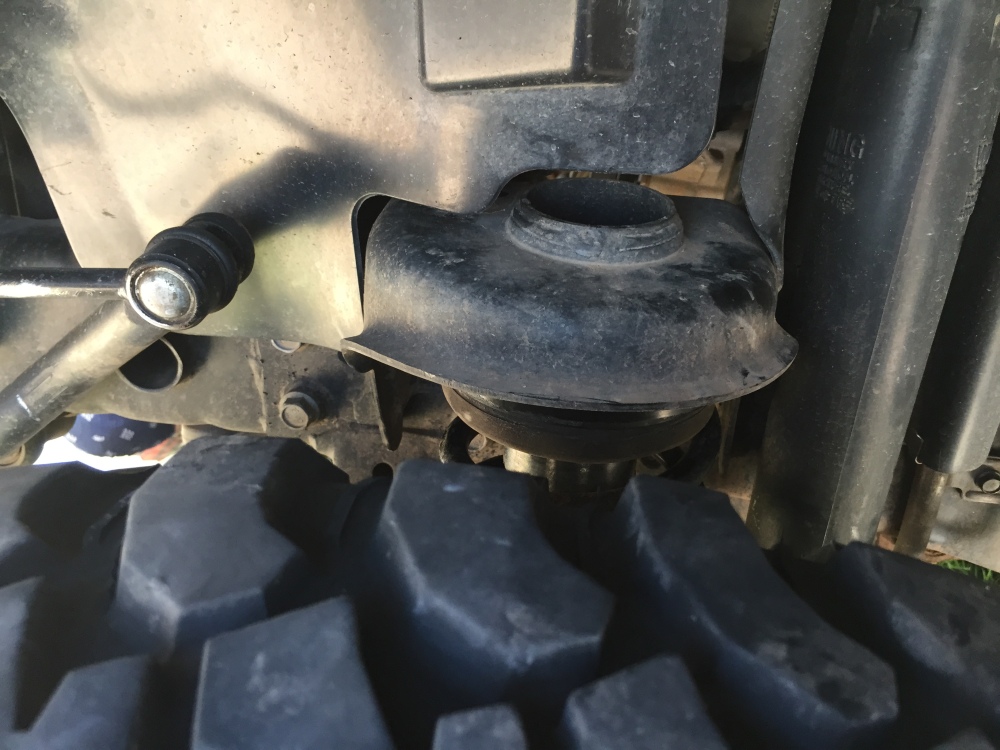
Using the floor jack, lower the axle. The front springs, in turn, should be easily removable. Next, remove the factory upper spring isolator and stack it at the bottom of the front Teraflex spacers. Use both spacers to remove the factory rake or only one to maintain it. Without the convenience of a floor lift, we used spring compressors to aid in getting the springs back into place.

With the front spacers in place, the kit is almost invisible upon close inspection. The effect on the Jeep’s stance, however, is fairly dramatic.
Once the spring is in place and the compressors have been removed, reinstall the shock and brake line bolts. Repeat the process for the opposite side.
Rear spacer installation
Installation for the rear will proceed much like the front: jack up the axle and remove one tire, then the lower shock bolt and disconnect the sway bar links. (One of mine must’ve been cross-threaded at the factory, because the last corner took FOREVER to remove!) Next, use the spring compressors to remove the springs and original-equipment upper spring isolator.
We did find the factory brake line needed to be removed from the frame on the left side to prevent overstretching.The rear Teraflex spacers are designed with a bulb that fits into a hole in the body above the factory isolator. You’ll want to put a good bit of grease around this bulb to ease with fitment. Using the floor jack and a block of wood, push (yes, the fitment is that tight) the spacer into place. Use caution, as the spacer will try to twist and turn before settling in the hole. It doesn’t fit snugly, but will snap into place with an audible pop.
That’s all there is to it! Reinstall the rear shocks, brake lines and sway bars. Then, replace the wheels and lower the vehicle to the ground.You’ll also want to adjust the aim of your headlights, as I nearly blinded my wife on the hour-long drive home from our friend’s house.
First impressions
While spacer lifts like this one won’t typically fluctuate in real-world lift height like a coil spring lift, here are the measurements from flat, level ground to the bottom edge of the fender flare (rounded to the nearest hundredth). Note, Smokey does wear a 69-pound aftermarket front bumper, which adds 43 pounds to the factory front-end weight, and that she has recently begun to exhibit a little “JK lean” to the right side.
Left front
Before: 35.75″ After: 37.88″ Net gain: 2.13″
Right front
Before: 35.75″ After: 37.75″ Net gain: 2.0″
Left rear
Before: 35.75 After: 37.31″ Net gain: 1.56″
Right rear
Before: 35.88″ After: 37.25″ Net gain: 1.37″
On the road, the differences are minimal, if noticeable at all. From the driver’s seat, I noted just the slightest decrease in steering wheel input at highway speeds, though in town driving was as normal. The low-speed ride also felt just a little less jarring on potholes or other sharp suspension changes, though my wife could not identify any change in ride quality. The suspension does squeak now over significant bumps, which I suspect is simply the springs rubbing against the new poly spacers. I’m hoping this diminishes over time as the spacers get broken in.
Total time to complete
About 4 hours (including a couple of lengthy breaks)
Total project cost
$127.24 (w/free shipping from Northridge 4×4)


Always love seeing what you’ve done with Smokey, Cary 🙂
LikeLiked by 1 person
Thanks. Not nearly as much as I’d like, of course. But, that’s Jeeping for ya!
I’ve got some plans for some fun videos of our upcoming Red River trip — I hope to give you all something worth watching. 😉
LikeLiked by 1 person
Looks great, Sir! Great article, and thank you for sharing!
LikeLiked by 1 person
Thanks. This build really is like throwing pebbles in a lake to raise the water level! 😉 She’ll get there one day!
LikeLiked by 1 person
Mind if I “share” your post?
LikeLiked by 1 person
Please do, any time. 😃
LikeLike
Thank you!
LikeLiked by 1 person
Reblogged this on Mickey~2~Travel and commented:
Fantastic post on installing a lift kit on your Jeep!
LikeLike
I just installed this today. Did you do any alignment adjustments. I have not and it seems to ride well. Straight and no pull.
LikeLiked by 1 person
No, I left the track bars and control arms in place, so there was no need for an alignment. She continues to drive straight. 👍🏻
LikeLike
I installed the same leveling kit with the purpose eliminating the ugly factory rake, make up for sag in the suspension, and allow for larger tires down the road (running Rubicon stock 32 BFGs currently). Did you go to 34″ tires without any problems? I ask because Taraflex advertises that the kit allows for a max tire size of 33″ (which is odd because supposedly you can run 33s on a stock suspension.
LikeLiked by 1 person
I upgraded from those same Rubi 32s to 33-inch Duratracs. Technically, you can run 33s on stock suspension but, based on a friend who ran at stock height the same size I now have, you’ll rub on the frame and the sway bar. With the leveling kit, I don’t rub at all. For what it’s worth, I also considered the 34×10.5″ BFG KO2s, but they were considerably more expensive for a negligible gain in height. My plan is to upgrade to a 2.5- or 3-inch spring lift before my next tire upgrade. Then, I’ll move up to 35s. Thanks for checking out the site!
LikeLike